To develop plug-ins for the IDE, you need to install the Eclipse Plug-in Development Environment (PDE) into the IDE. This section describes how to install PDE.
Start the IDE, and select Help -> Install New Software… from the menu. This will bring up the Install dialog.
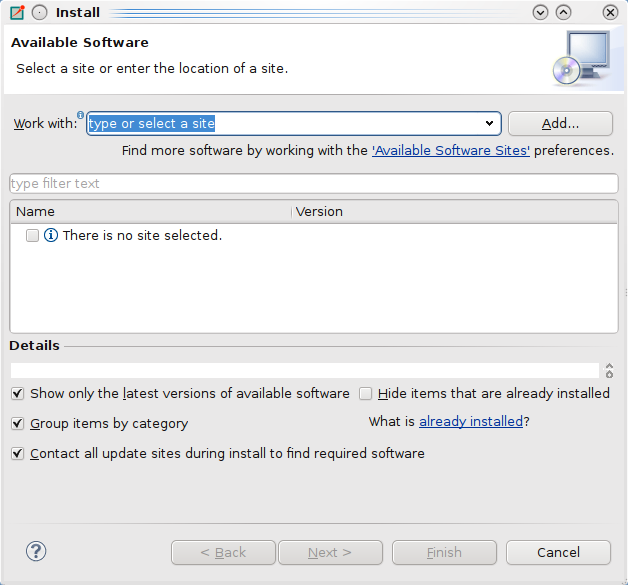 |
At the top of the dialog you can choose an Eclipse software repository to install software from. Select Indigo from the list.
If Indigo is not present, add it: Click the Add… button, then fill in the dialog that comes up:
-
Name:
Indigo -
Location:
http://download.eclipse.org/releases/indigo
Then click OK.
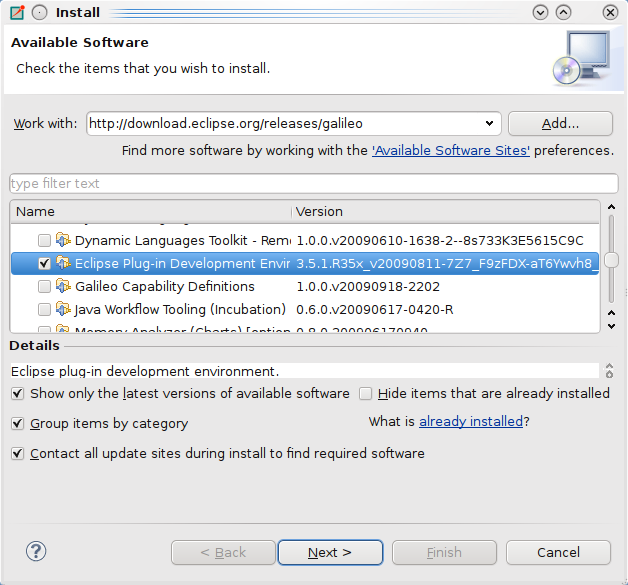
After a while, the Install dialog should show the list of available Eclipse packages. Select Eclipse Plug-in Development Environment from the General Purpose Tools group, then go thought the rest of the wizard to get PDE installed. This will install PDE’s prerequisites, most notably JDT (Java Development Tooling) as well.
 |
When the download and the installation finished, restart the IDE.
Now the IDE is ready for plug-in development.