Table of Contents
The OMNeT++ simulation IDE is based on the Eclipse platform and extends it with new editors, views, wizards, and other functionality. OMNeT++ adds functionality for creating and configuring models (NED and INI files), performing batch executions and analyzing the simulation results, while Eclipse provides C++ editing, SVN/GIT integration and other optional features (UML modeling, bug-tracker integration, database access, etc.) via various open-source and commercial plug-ins. The environment will be instantly recognizable to those at home with the Eclipse platform.
The Eclipse main window consists of various Views and Editors. These are collected into Perspectives that define which Views and Editors are visible and how they are sized and positioned.
Eclipse is a very flexible system. You can move, resize, hide and show various panels, editors and navigators. This allows you to customize the IDE to your liking, but it also makes it more difficult to describe. First, we need to make sure that we are looking at the same thing.
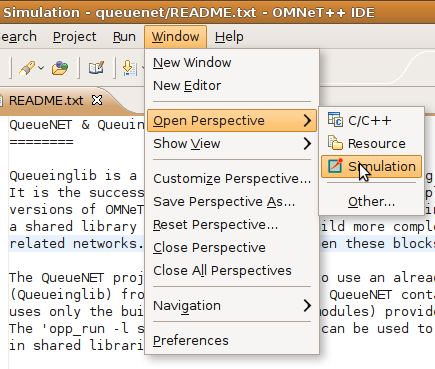
The OMNeT++ IDE provides a "Simulation perspective" to work with simulation-related NED, INI and MSG files. To switch to the simulation perspective, select Window | Open Perspective | Simulation.
Most interface elements within Eclipse are can be moved or docked freely so you can construct your own workbench to fit your needs.
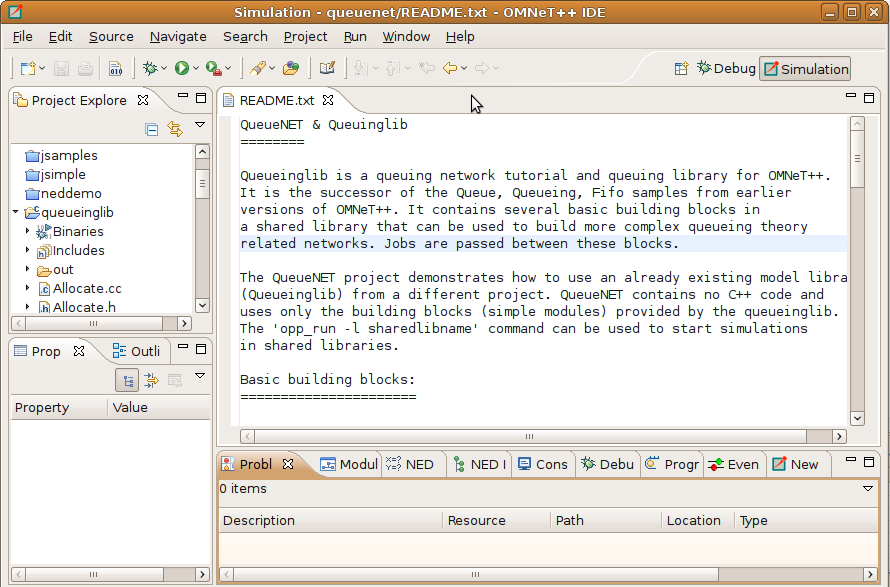
The Project Explorer on the top left part of the screen shows the projects
and their content in your workspace. In the example above, the queueinglib demo project is open.
You can see the various .ned, .ini and other files inside. A number
of views are docked at the bottom of the window.
The screenshot shows the open README.txt file in the editor area. When a user double-clicks on a file, Eclipse automatically launches the editor associated with that particular file type.
The Properties View contains information on the particular object that is selected in the editor area, or one of the other views that serve as a selection provider. The Problems View references code lines where Eclipse encountered problems.
Several OMNeT++-specific views exist that can be used during development. We will discuss how you can use them effectively in a later chapter. You can open any View by selecting Window | Show View from the menu.